Multi-site Wagtail
Wagtail makes it simple to set up a multi-site structure which can be administered entirely through the admin interface.


You can easily:
- create new sites with their own page trees
- assign specific editorial permissions to these groups
- modify the look and feel on a site-by-site basis.
All this can be managed from within one Wagtail admin interface, and with minimal initial developer setup.
In this post I'll look at how this can be achieved using groups, permissions, the Site Settings module, and some creative template development.
For the purposes of this demonstration, I’ve created an example multi-site implementation of Wagtail on Github. Follow the instructions in the README to get it up and running in under 5 minutes. I've included links to the relevant points in the code in Github wherever possible, but I'd encourage you to set the example site up, so you can explore the code and see the example admin settings.
What I'll cover in this blog post
In this post I'll briefly explain the steps involved in creating a multi-site setup with Wagtail, including:
- Setting up multiple page trees
- Using the Sites menu to create new site records
- Creating Site Settings to modify the appearance and content of individual sites
- Modifying the Wagtail templates to utilise these settings
- Creating site-specific permissions using Groups
Note: This blog post doesn't cover any necessary DNS changes or request routing to get a multi-site application running on the web. Please refer to the documentation for your particular application server for this information. In my example implementation I've used sub-domains of localhost, so you shouldn't need to worry about it.
Setting up multiple page trees
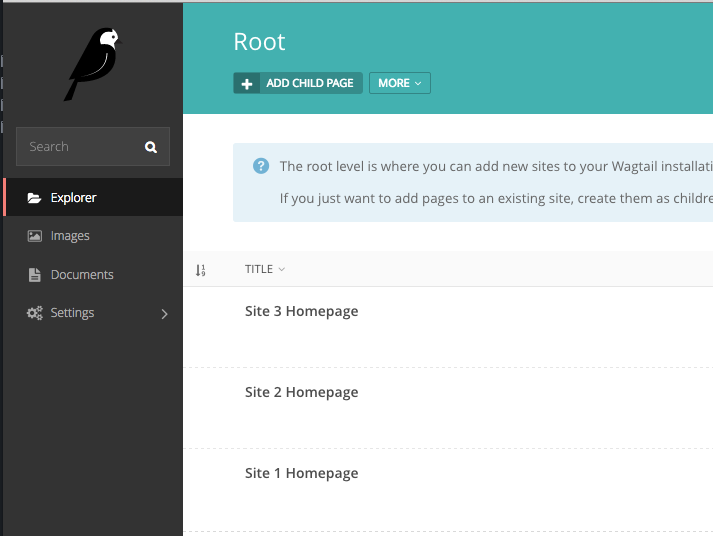
Every site needs a homepage, so creating these pages is the first step. You can either create brand-new pages, or you can ‘copy’ an existing homepage, with or without its child pages.
These homepages need to be children of the ‘site root’. You get to the site root by first navigating to any explorer page, then clicking the ‘Home’ icon in the top left, to the right of the Wagtail logo.
Creating the individual Site records
We then need to actually define the new sites, in the appropriately named 'Sites' menu. In my example implementation you’ll see that as well as the original ‘localhost’ site that is created when you install Wagtail, I’ve created two additional sites based on sub-domains of localhost.

The advantage of using sub-domains when you’re testing is that you don’t have to change anything in your .hosts file. If you want to use completely different hostnames you’ll need to add these into your hosts file so that they work in a local development environment.
Also, when testing, remember to set the port for each site to 8000, as this is the port that Wagtail uses by default when running locally.
Site settings
This is where the magic happens! Site settings is a contributed Wagtail module, originally developed by Tim Heap, of TakeFlight in Hobart, Australia. This module allows us to create groups of settings that can be set differently for each of our sites.
You can see more information on the installation and usage of site settings in the Wagtail documentation.
Once you have the site settings module added to your INSTALLED_APPS, you can create these settings just like any regular page models. You declare them as settings by using the @register_setting decorator. Settings can be placed in any app in your Wagtail instance. For the example implementation, I’ve broken my settings out into a ‘utils’ app, to keep them separate from my page specific apps (this is also where I’ve placed my site-wide template tags).
I’ve included three settings models in the example application:
This is straight from the example implementation of Site Settings in the Wagtail documentation, but site-specific social media links are a very obvious use case all the same.
The footer links on a site are almost always going to be different from those used in the main navigation, so we can’t always rely on the ‘Show in menus’ to create the footer menu.
This settings model is a simple repeatable and orderable inline field, including a link title, and an option for either an external link or an internal page chooser.
This could be the most controversial settings model. This enables an admin to change the logo on a site-by-site basis, and also the colour of the header panel, via a hexadecimal colour code. Generally it is considered a good idea to keep a clear separation between the design and the content of the website. Giving content editors too much power over design elements of the website can result in a disjointed user experience.
However, in some cases you just can’t avoid providing some level of customisation. It's worth noting that this example could be more controlled, by providing a choice between 3-4 colours, rather than giving free reign with colour values.
Modifying the templates to utilise the settings
As described in the Site Settings documentation, to utilise settings in your templates you need to first add a new template context processor:
TEMPLATES = [
    {
        'BACKEND': 'django.template.backends.django.DjangoTemplates',
        'DIRS': [
            os.path.join(PROJECT_DIR, 'templates'),
        ],
        'APP_DIRS': True,
        'OPTIONS': {
            'context_processors': [
                'django.template.context_processors.debug',
                ...
                'wagtail.contrib.settings.context_processors.settings',
            ],
        },
    },
]
Once that’s in place you can reference any setting using the following syntax:
settings.[app-name].[setting-model-name].[field-name]
In our example implementation, all of the settings are grouped together in the ‘utils’ app. So to access, say, the Facebook URL in our settings, we would use the following template tag:
{{ settings.utils.SocialMediaSettings.facebook }}
Wagtail then knows which version of the site settings to apply for the site you are currently viewing. In the example implementation, I’ve opted to shorten this anywhere I can using the ‘with’ template function:
{% with settings.utils.SocialMediaSettings as social %}
So then I can refer to the Facebook URL like so:
{% if social.facebook %}
    <li class='footer-link'><a href="{{ social.facebook }}">Facebook</a></li>
{% endif %}
You can see this example in place in the footer.html file on GitHub.
All the other settings implementations follow this same pattern. The logo from SiteBranding can be found in header.html. The banner_colour value is added directly into the head of the base.html template as an inline style.
{% with settings.utils.SiteBranding as branding %}
    <style>
        {% if branding.banner_colour %}
            .header{background-color:#{{ branding.banner_colour }};}
        {% endif %}
    </style>
{% endwith %}
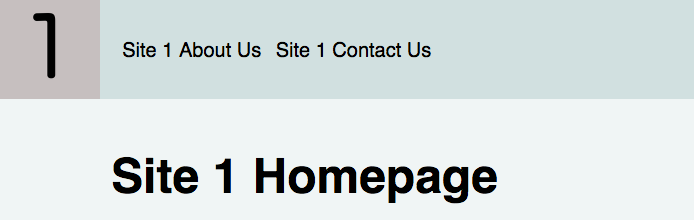
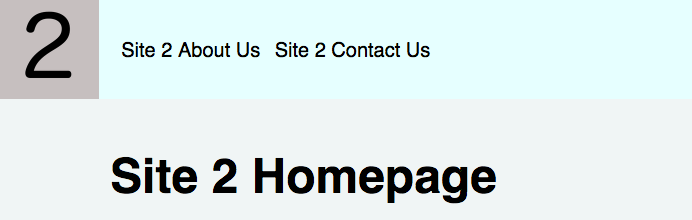
Here are those different branding settings in effect, with each site having its own logo and banner colour.
Managing site permissions
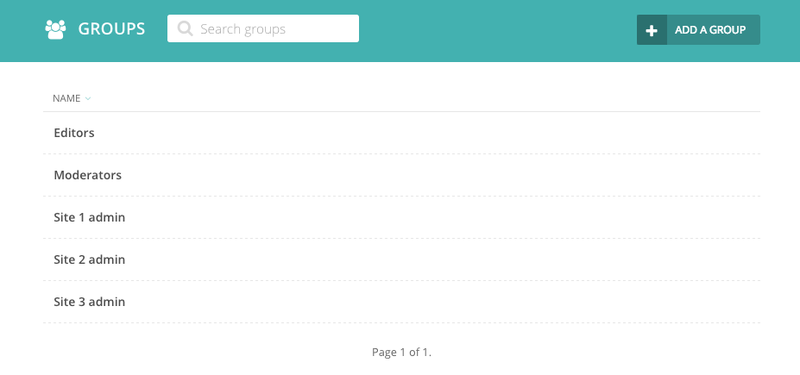
Often you'll want to limit editors' and admins' permissions to only allow them to edit their own site. This is easily achieved using the Groups functionality that comes out-of-the-box with Wagtail.
In the example implementation, I've created three new groups in addition to the default Editors and Moderators groups. Each of the new groups has Edit and Create permissions only for its specific site.
Take a look into the permissions of one of the new groups in the example implementation. To restrict a group to a single site, select only the appropriate homepage for that group in the page permissions section.
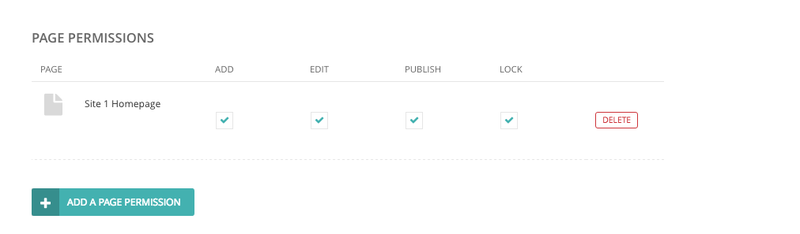
Users in this group will be able to see the other sites' content in the explorer menu, but they won't be able to create, edit, or delete any content in them.
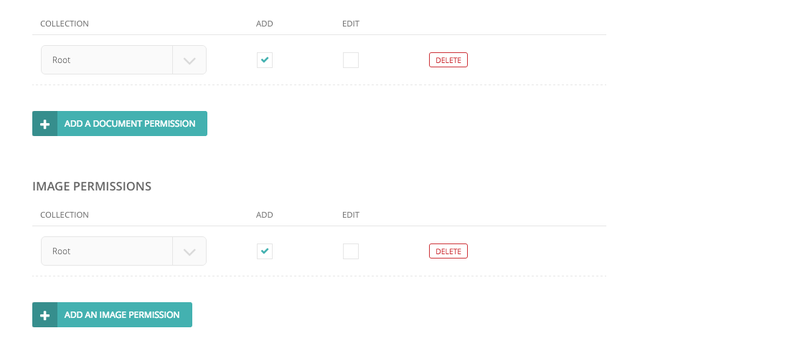
As you go down the group settings form, you'll notice I've also restricted the groups to 'Add' permissions only for both documents and images. This allows users in these groups to add new images or documents, and edit any they themselves have uploaded, but they can't then edit or delete any uploaded by other users. Users can still insert into page any images or documents from the library that are available across the sites.
Wrap up
That's it for this post. By following the setup laid out in the example implementation, you can quickly get multiple sites up-and-running and, with a very little initial development work, enable new sites to be created via the Wagtail admin without having to touch the code.
This Week in Wagtail
A weeklyish newsletter with Wagtail tips, news, and more.